Sourdough Bread Recipe


If you cannot see the video, try turning off your ad blocker.
This is a very fast video to quickly demonstrate the steps. For a more detailed video, please see our video here on Youtube.
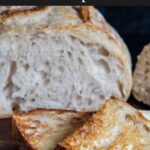
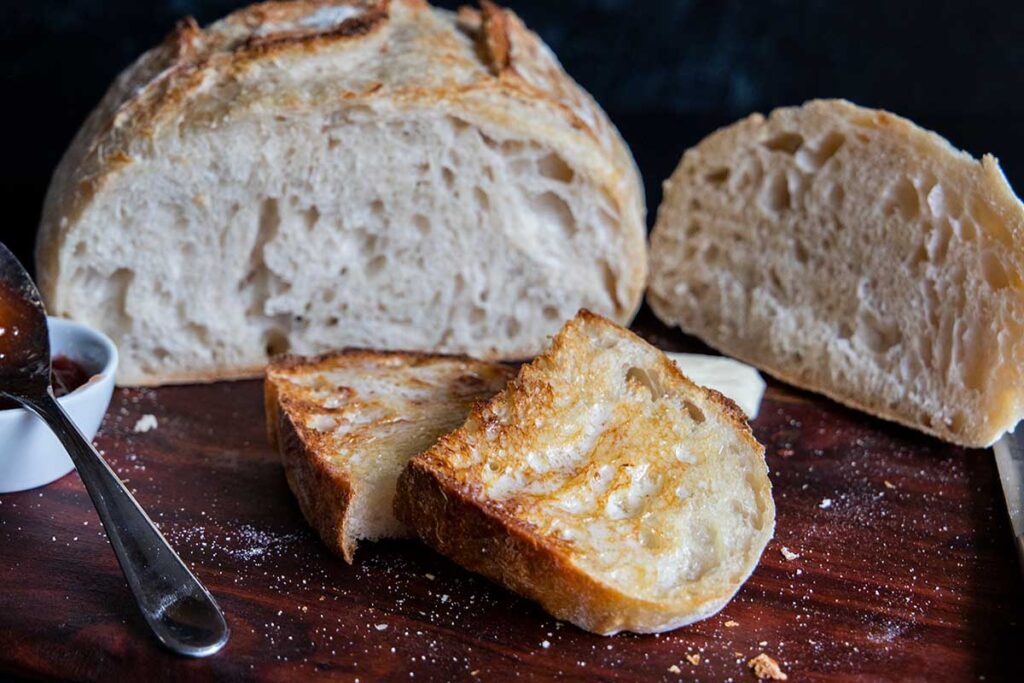
This sourdough bread recipe has a chewy textured center with a crispy, crunchy crust and a delicious tangy sourdough flavor!
We’ve been working on our sourdough bread recipe for almost 2 years. There was much trial and error, tweaks, etc to the whole process, but now we can nail this thing every time.
It’s not as hard as you would think. And we hope we have taken all the mystery out of it with our step-by-step guide.
We believe that if these steps are followed, you can reduce your learning to a fraction of the time.
With that said, you will probably not make a perfect loaf the first time. Sourdough takes time to learn and “feel” the process. At least it did for us.
You learn by doing it repeatedly: how the dough is supposed to feel and look during each step of the process. The good side of this is that your home will be filled with the wonderful smell of freshly baked bread. Not too shabby, right?
How To Make Sourdough Bread
Sourdough bread is a slow-fermented bread that does not require commercial yeast. It has a chewy textured center with a crispy, crunchy crust and a delicious tangy flavor!
We started with Joshua Weissman’s sourdough starter recipe. His video is about 9 minutes long, and he explains the process in great detail. We highly recommend using this method for making a sourdough bread starter.
The starter will take at least 7 days to become ripe, active, and ready to use.
Ingredients Needed for Sourdough Starter
- Rye flour
- Unbleached all-purpose flour
- Filtered water
Tools Needed for Sourdough Starter
- Large glass jar
- Food scale
- Spatula
- Thermometer
We refrigerate our starter when not in use. So several days before planning to make the bread remove it from the fridge and let it come to room temperature before feeding.
Discard all but about 1/4 cup (about 32 grams) to 1/3 cup (about 43 grams) of starter and feed 50 grams of all-purpose flour and 50 grams of room temperature water.
Repeat this process twice daily (every 8 hours or so) for three days.
In the morning of the day, you are going to make the dough, again, discard all but 1/4 cup to 1/3 cup of the starter and feed the starter at least 100 grams of all-purpose flour and 100 grams of room temperature water.
How do you know when your starter is ready? It should double, if not triple in size. You can drop a tad of the starter into a small glass of water, and if it floats, it’s ready!
Once you have accomplished a “ripe” or fully developed sourdough starter, you are ready to make the bread dough.
We always feed it the night before we plan to mix the dough. Then we feed it again about 2-3 hours before we are ready to start the process. That’s about how long ours takes to double in size. This will differ depending on the temperature of your kitchen.
We usually place ours in the oven with the light on because we keep our house pretty cool. The light heats the oven just enough to give the starter a warm environment.
BUT let us warn you to place a sign OVER the oven controls so no one turns it on! Don’t ask me how I know this can happen.
The older your starter and the more you feed it will bring a stronger, more developed flavor to the bread. So bake away! Practice makes perfect.
Ingredients Needed for Sourdough Bread
- Ripe sourdough starter
- Bread Flour (or all-purpose flour)
- Water – We always use filtered for the bread dough and the starter feedings.
- Kosher salt
We have played around for a while with different measurements to create the best loaf of bread. The amounts below are what we use every single time now, and it never fails us.
Place a large bowl or a round food storage container on the food scale and zero it out.
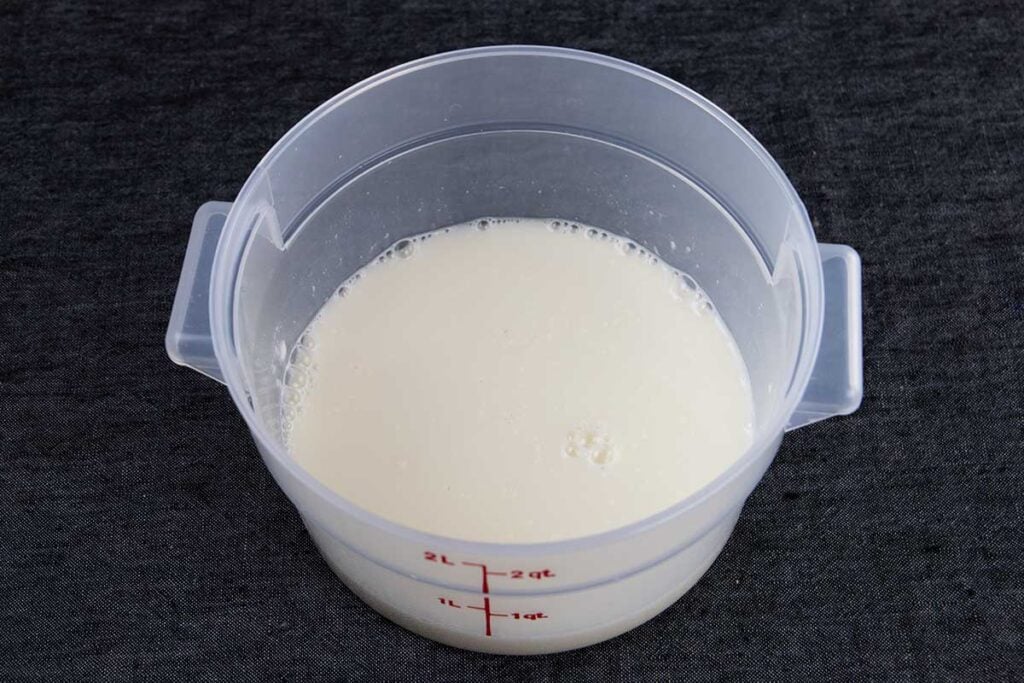
Add 140 grams of active sourdough starter, zero the scale out again and add 255 grams of room temperature filtered water. Stir to combine the starter and water.
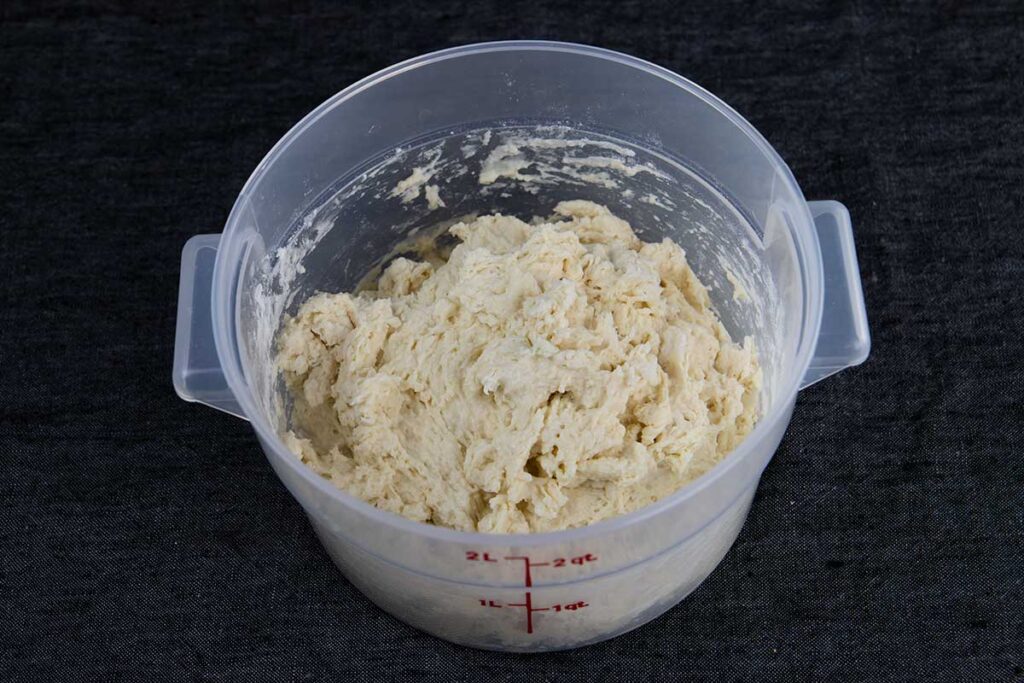
Place the container back on the scale, zero it out again and add 380 grams of unbleached bread flour. Stir with a dough whisk or use your hands to mix the dough until no dry flour remains and it pulls away from the sides of the bowl.
Place a small container on the scale and measure 11 grams of kosher salt. Set aside.
Cover the bowl and autolyze (let rest) for two hours.
What is Autolyse?
Autolyse is just mixing the flour and water before adding any other ingredients. This technique allows the flour to absorb the water and become fully hydrated. The enzymes in the flour are activated and start the gluten to develop. Also, starch is broken down into simple sugars that the yeast feeds on.
During this time, the dough takes on a smoother texture and begins to strengthen overall. This makes the dough easier to work with and shape. And that makes a loaf with better texture, rise, and flavor.
After the two-hour autolyze, add half the salt. Stretch and fold four times. Add the remaining salt. Stretch and fold another four times (see video). Cover the container again and let rest for 30 minutes.
It’s easier and less messy if you dampen your fingers before folding the dough.
Over the next 1 1/2 hours (after adding the salt and folding), you will stretch, fold, cover, and let rest every 30 minutes.
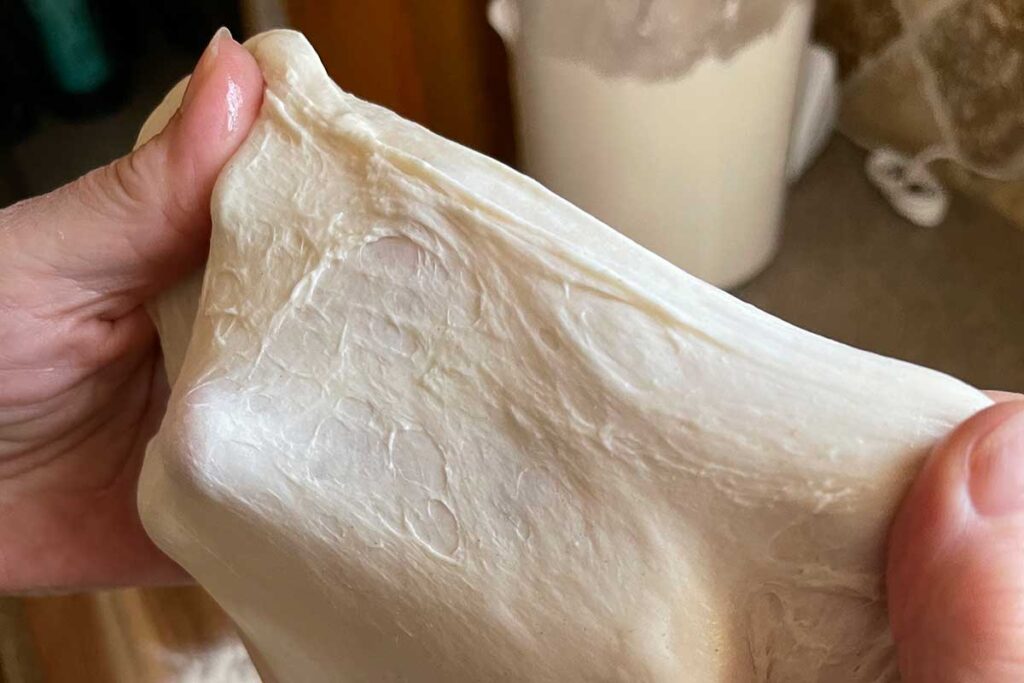
After the last fold and rest time, you should be able to stretch a windowpane. (see video)
Pre-shape the dough on a lightly floured surface and let it bench rest for 20 minutes. Don’t use too much flour.
Learn to work with a slightly sticky dough. When you get comfortable with the sticky dough, you can make any bread you desire. This is a lesson we have had to learn through trial and error.
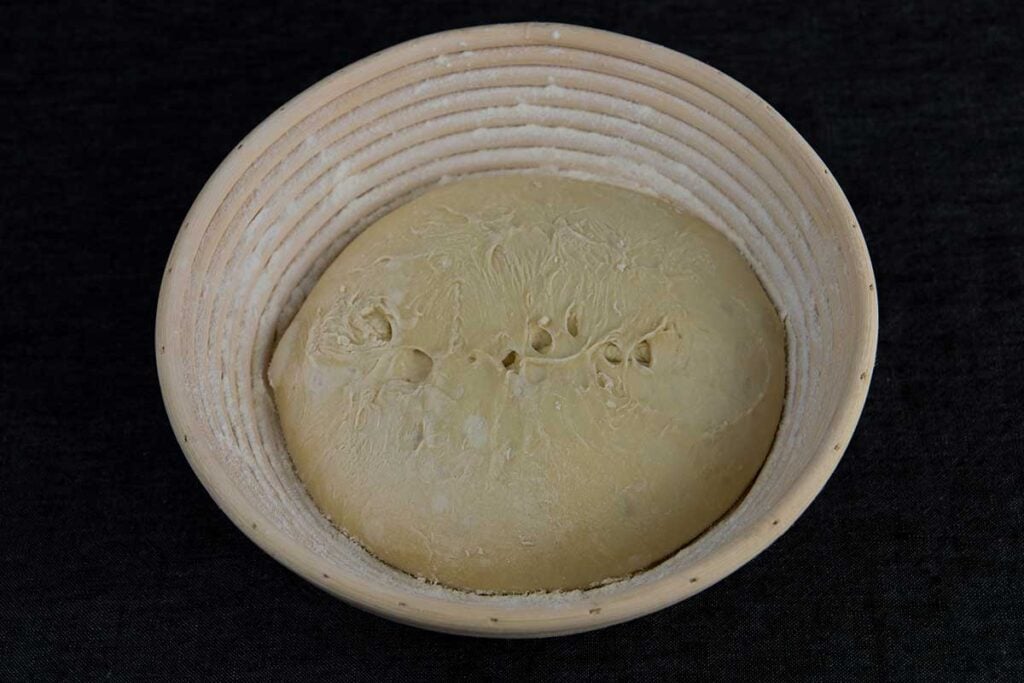
After 20 minutes, you will shape the dough into a boule and place it in a well-floured banneton seam side up. We use a mixture of equal parts flour, rice flour, and semolina flour.
This is what we, and others, call dusting flour. If you use straight flour, the dough will more than likely stick to the banneton. Trust us.
If you don’t have a banneton use a medium-sized bowl. If you’re interested in baking, get one. They’re cheap on Amazon and worth having.
Dust lightly with flour and place in a large plastic bag or cover with plastic wrap so the dough doesn’t dry out. We use a 2-gallon ziplock bag. Refrigerate it for at least 12 hours overnight.
Baking The Sourdough Bread
The next morning (or when ready to bake), pull the dough out of the refrigerator, remove it from the bag, unwrap it, and let it warm up for about two hours. To determine if it’s ready, lightly press the dough with your fingertip.
It should retain the dimple and slowly bounce back.
We usually let it warm for 2 hours. It’s ready to bake when you press a fingertip lightly into the dough, and it leaves a slight indention and doesn’t spring right back up.
While the dough is warming, preheat the oven to 500 degrees F with the dutch oven in.
If you are using the oven light to help warm the dough, be sure to REMOVE it from the oven before preheating. Place the dutch oven in the oven to preheat as well.
Once the oven is preheated, place a piece of parchment paper over the top of the banneton or bowl, carefully hold a cutting board or baking sheet over the banneton and flip it over onto the parchment paper.
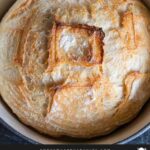
Spray a lame (dough slicing knife) or sharp knife with cooking oil spray and make a cross pattern on the top of the dough.
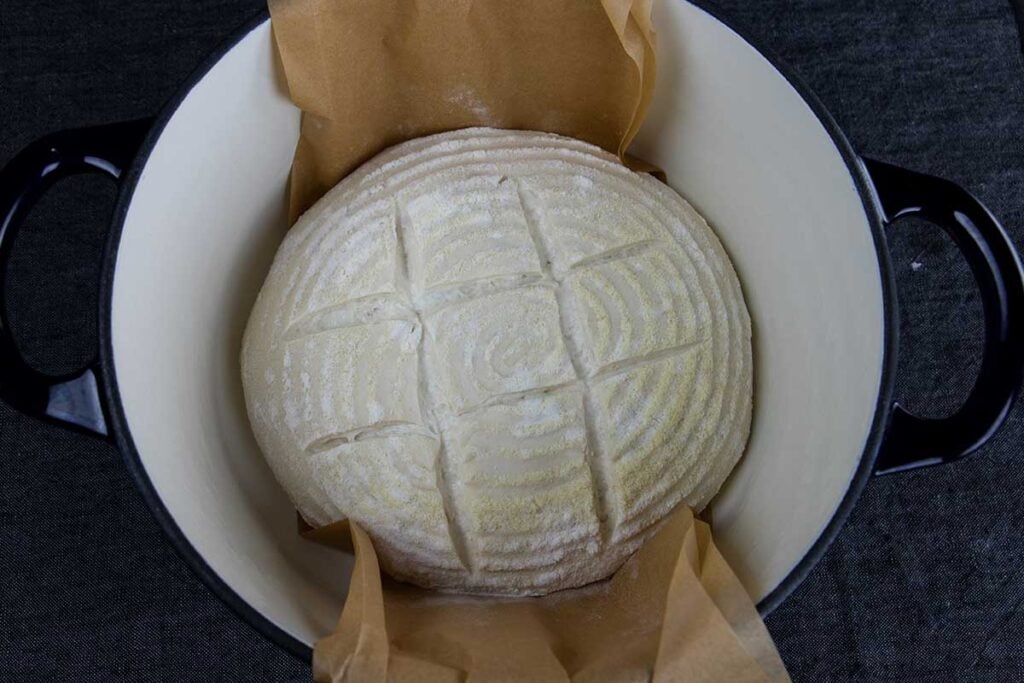
Carefully place the dough using parchment paper as handles into the preheated dutch oven. Exercise caution as the dutch oven will be very hot.
Place the dutch oven in the hot oven and spray with water at least 10 times. This will add steam to the process.
Carefully place the dutch oven lid on and turn the oven down to 435 degrees F.
Bake with the lid on for 20 minutes. All ovens are not the same, and we have had to play around with times and temperatures to perfect our sourdough baking. This is when the bread rises to its full potential!
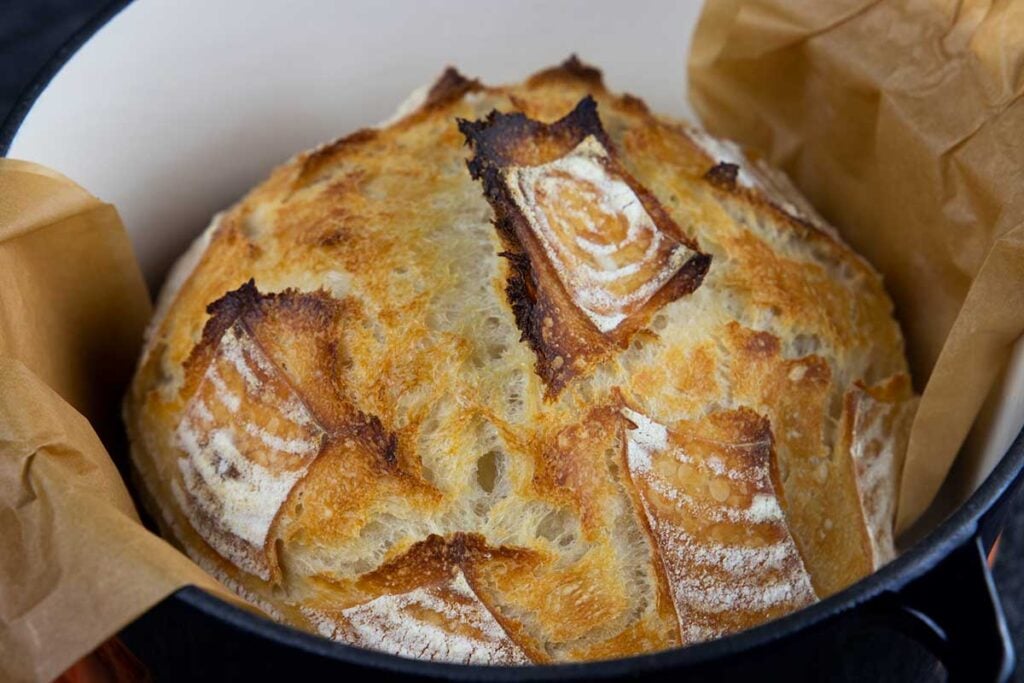
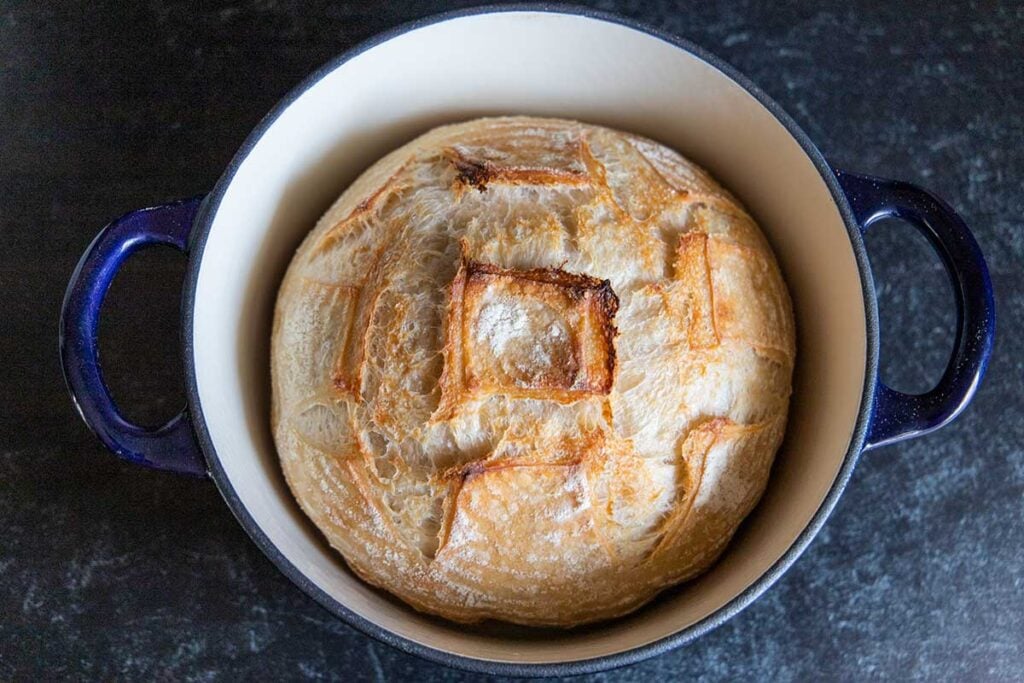
After 20 minutes of baking, it’s time for the BIG REVEAL! Remove the lid, rotate the pan, and bake another 15-20 minutes.
This is our favorite part, and it never gets old. We both rush to the kitchen to see how much it has risen.
If you are unsure if the bread is baked, you can use a thermometer to test the internal temperature. It should register around 208 degrees F. It should sound hollow when thumped.
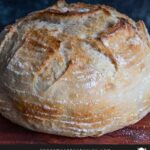
Pull it out of the oven and revel in your bread masterpiece!
Nothing beats pulling out this kind of food art. The house smells amazing as the family gathers around in awe. It just never gets old.
Every day it seemed like we were making this bread, and it came out perfect each time. And the flavor … yeah, it’s there.
When we started working on this, we followed one recipe after the other. Some were good, some were not. We took bits and pieces that worked from each to come up with our own method to make this bread that works.
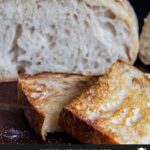
This bread goes with everything. Your Italian dishes, sandwiches. If it calls for bread, this is a winner.
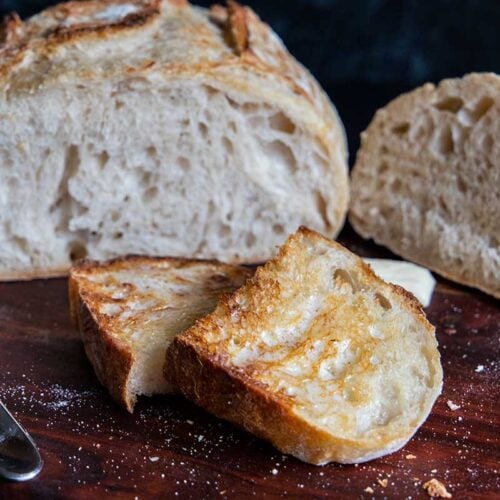
You get those wonderful holes in the bread, the crumb is soft, and the crust is a perfectly crusty golden brown.
There are thousands of recipes for making a relatively easy sourdough. This one is ours; it looks great, tastes even better, and more importantly, you can do it. We hope you give it a try! You won’t be sorry.
Conclusion
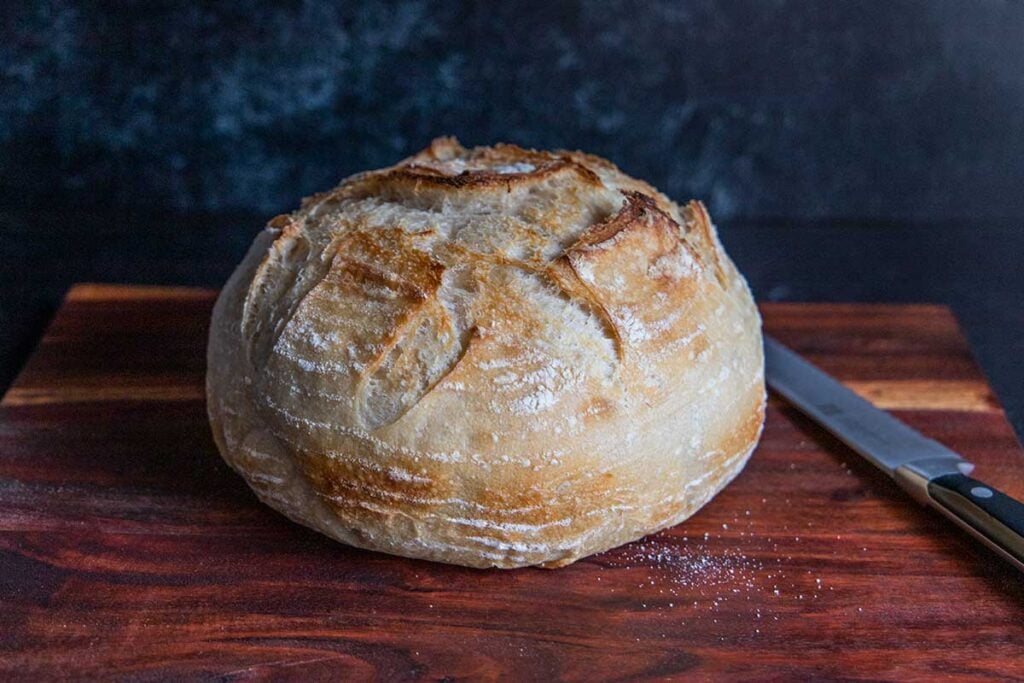
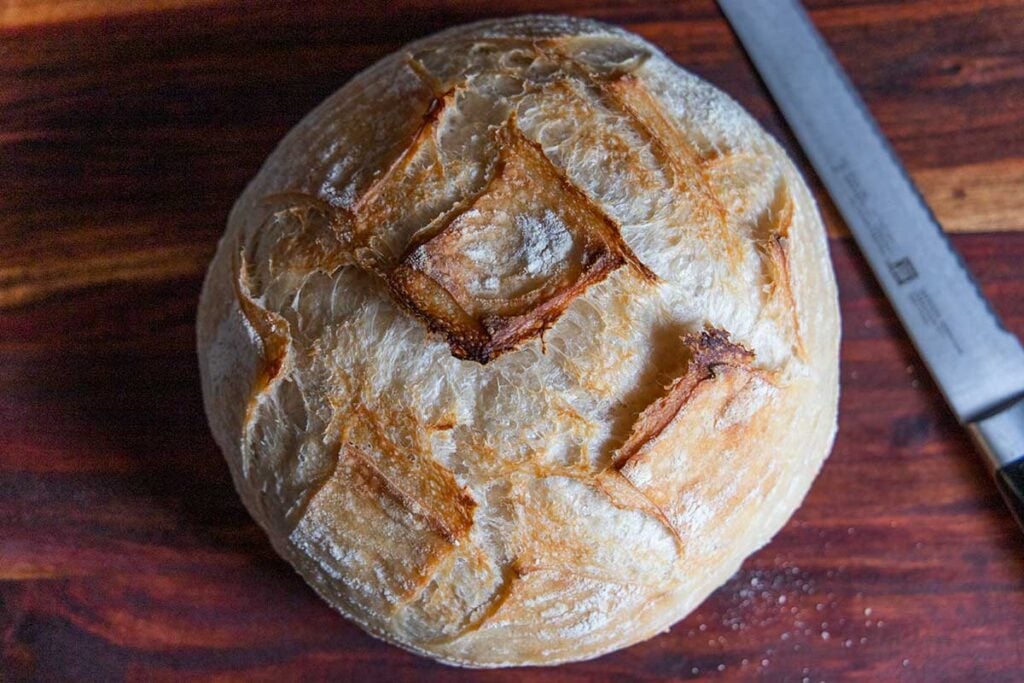
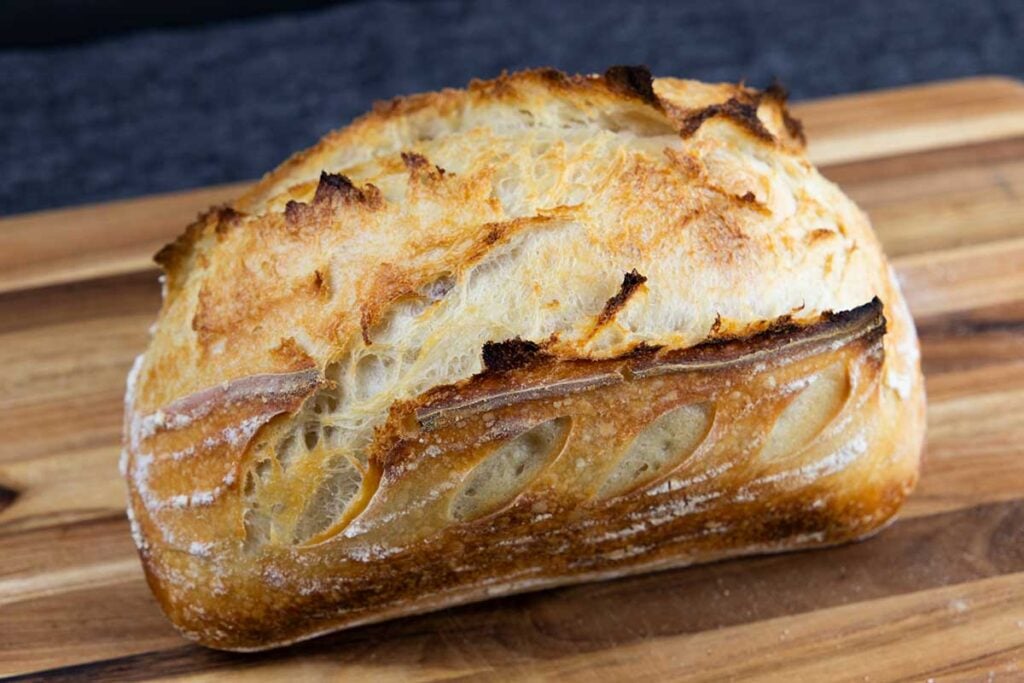
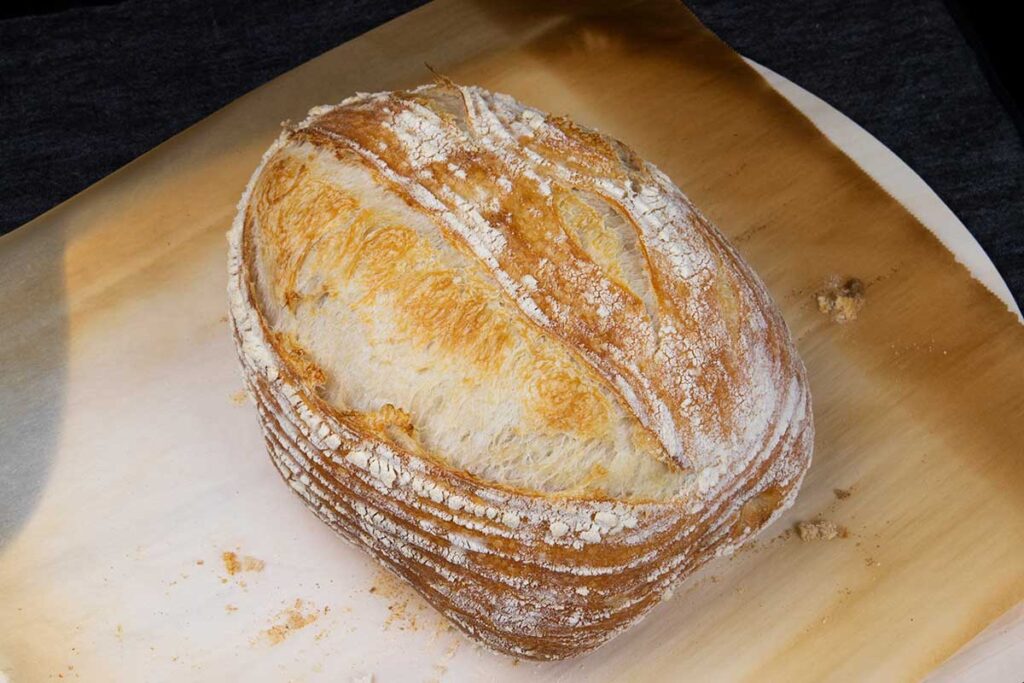
We use this same recipe to make all our boules, batards, and loaves. Depending on how you want to present the bread, the recipe doesn’t change, only how you bake it.
Speaking of ways to bake it, you can even bake this bread on your smoker, which is fabulous. You can check that out here!
Below are just a fraction of some pictures of the bread we have made using this recipe.
Tools We Use
Here are some tools we use to make our bread. While none of them are required, each makes the steps a bit easier.
Our Pick
Proofing Set, by Kook, Sourdough Bread, 2 Rattan Banneton Baskets, 2 Basket Covers, Metal Scraper, Plastic Scraper, Scoring Lame, 5 Blades and Case, Round Shape
This link includes two proofing boules, a lame (for scoring your bread), and scrapers.
Our Pick
Jillmo Danish Dough Whisk, 12inch Stainless Steel Whisk
Dough whisk. You can use your hands instead. In the past, it was fine, but we prefer the dough whisk.
Don’t Sweat The Recipe is supported by its readers. We may earn a commission if you purchase through a link on our site. Learn more.
FAQ
Some studies suggest that sourdough bread is prebiotic that aids digestion. Furthermore, this bread contains less phytate, allowing better nutrient absorption than store-bought bread. Yeast, flour, salt, and water are the only ingredients for this bread.
With anything, practice makes perfect. The ingredients are simple. It’s just a matter of being comfortable working with the dough.
It’s very possible that you allowed it to proof for too long. The sourdough is ready to be baked when you press your finger into it, and it slowly bounces almost all the way back.
A longer proofing time will improve the sourdough flavor. This is why it is recommended to proof your sourdough in the refrigerator. But it’s not necessary.
A minimum of four stretches. This will develop gluten. If you pull the dough in your fingertips and get a good ‘windowpane‘ without it tearing, it’s ready to go.
Try these bread recipes!
- Quick And Easy White Bread Recipe
- No Knead Large Dutch Oven Bread
- Soft and Fluffy One Hour Dinner Rolls
- Jalapeno Hushpuppies
Sourdough Bread Recipe
Ingredients
- 140 g active sourdough starter
- 255 g water room temperature
- 380 g unbleached bread flour or all-purpose flour
- 11 g kosher salt or sea salt
Instructions
- Place a large bowl or a round food storage container on the food scale and zero it out.
- Add 140 grams of active sourdough starter, zero the scale out again and add 255 grams of room temperature filtered water. Stir to combine the starter and water.
- Place the container back on the scale, zero it out again and add 380 grams of unbleached bread flour. Stir with a dough whisk or use your hands to mix the dough until no dry flour remains and it pulls away from the sides of the bowl.
- Place a small container on the scale and measure 11 grams of kosher salt. Set aside.
- Cover the bowl and autolyse (let rest) for two hours.
- After the two-hour autolyse add half the salt. Stretch and fold four times. Add the remaining salt. Stretch and fold another four times (see video). Cover the container again and let rest for 30 minutes. It’s easier and less messy if you dampen your fingers before folding the dough.
- Over the next 1 1/2 hours (after adding the salt and folding) you will stretch and fold, cover and let rest every 30 minutes.
- After the last fold and rest time, you should be able to stretch a windowpane.
- On a lightly floured surface pre-shape the dough and let it bench rest for 20 minutes. Don’t use too much flour.
- After 20 minutes you are going to shape the dough into a boule and place it in a well-floured banneton seam side up. Dust lightly with flour and place in a large plastic bag or cover with plastic wrap so the dough doesn’t dry out.
- The next morning (or when ready to bake) pull the dough out of the refrigerator, remove it from the bag or unwrap it, and let it warm up a bit.
- While the dough is warming preheat the oven to 500 degrees F with the dutch oven in.
- Once the oven is preheated, place a piece of parchment paper over the top of the banneton, carefully hold a cutting board or baking sheet over the banneton and flip it over onto the parchment paper.
- Spray a lame (dough slicing knife) or sharp knife with cooking oil spray and make a cross pattern in the top of the dough.
- Carefully place the dough using parchment paper as handles into the preheated dutch oven. Careful, the dutch oven will be hot. Place the dutch oven in the hot oven and spray with water at least 10 times. Carefully place the dutch oven lid on and turn the oven down to 435 degrees F.
- Bake with the lid on for 20 minutes. Remove the lid, rotate the pan, and bake another 15-20 minutes.
The best recipe I’ve tried so far! Thank you for sharing. One question – what is the purpose of adding the salt in the manner you do? I’m sure there’s good reason, but I’m always worried that it’s not getting mixed in thoroughly enough.
Hey Jill, glad you liked the recipe! So, adding salt inhibits gluten development by tightening the gluten strands. Waiting for a period allows for the flour to fully hydrate and develop gluten more evenly. You get a better dough structure and texture.
LOVE how smooth and easy this recipe was to follow! Don’t sweat the sourdough bread! Delicious crusty bread. Will definitely make again.
Thanks so much! It’s a staple in our house, for sure! 🙂
Before putting in the fridge let the dough rise in the basket. When ready to put in oven leave out for only 1 hour or less, make your cut then put in oven. Otherwise your cut will deflate the dough and flatten out when you bake it.
Such an easy and amazing sourdough recipe. My family goes crazy over this bread when I make it. I now have to double the recipe because they eat it all so fast. Thanks for sharing!